User Tools
Sidebar
This is an old revision of the document!
Table of Contents
Full detector simulations
Currently, the full detector simulation can be done using the SLIC software. You will need to convert ProMC files to LCIO files and use these files for the “slic” Geant4-based program. To process SLCIO files, you will need Jas4pp program.
The files with full simulations are located under the “rfullNNN” tags (“NNN” is a number) Here how you can find all samples that have “rfull” tag for download. Click here: http://atlaswww.hep.anl.gov/hepsim/list.php?find=rfull. If you need to find all files for a give tag, say rfull005, use this command:
hs-find tev10mumu%rfull005
which searches for all samples with the dataset name “tev10mumu” (mu+mu-, 40 TeV samples). Then download a selected sample as:
hs-get tev10mumu_pythia6_zprime10tev_qqbar%rfull005
The detector repository contains the description of available detectors. Each “rfullNNN” tag corresponds to the detector given in the detector repository.
The physics performance studies are listed here. They are based on Jas4pp program.
Visualizing events with Jas+Wired
You can run Jas+Wired to visualize the simulated events. The Wired program is included in Jas4pp, so you simply run it as:
./jaspp
This will start a Jas3-like environment with all needed plugins. Then copy the detector geometry file from the detector repository.
wget http://atlaswww.hep.anl.gov/hepsim/soft/detectors/sidloi3.tgz -O - | tar -xz;
This will create a directory “sidloi3”. This detector corresponds to “rfull001” tag used for the reconstruction of pythia6_zpole_ee (Z→e+e-).
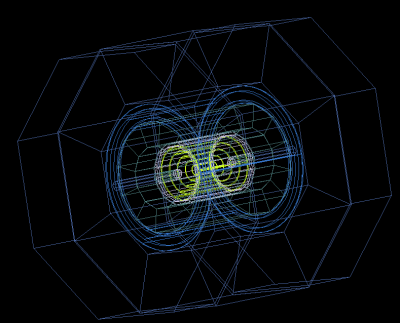
Now we can visualize the detector as [File]-[Open data source]-[HepRep] XML and select the file “sidloi3.heprep” from sidloi3.tgz: This is how to do this using the command line:
./jaspp sidloi3.heprep
You will see the detector layout:
Now, we will read the event: Open any *.slcio file you copied from HepSim as [File]-[Open data source]-[LCIO] file. Then click a small button [Go] (top menu bar). It will process events. Then select again [File]-[New]-[Wired 4 view]. You will get an image in the Wired4 display. Now press [Go] again to look at next event.
If you want to see how data records are organized inside the slcio file, do this [File]-[New]-[LCSim Event browser]
Generally, when you open a SLCIO file from the HepSim, you do not need to load the geometry file. The geometry file will be downloaded automatically from HepSim and will be put to “.lcsim/cache/” inside your home directory.
Visualizing geometry using ROOT
(contribution from N.Nikiforou):
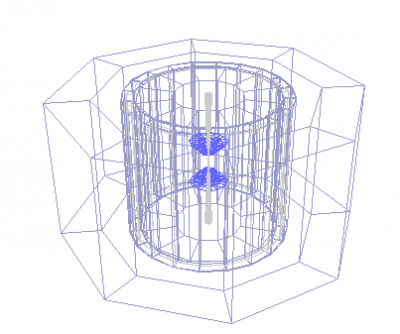
You can also visualize the detector using ROOT. Here are a few steps: Locate the file detector.gdml inside the file detector.zip (where “detector” shows the name of the detector).
show more details here
show more details here
This file is created using this command during the detector design stage
slic -g detector.lcdd -G detector.gdml
Once you have the GDML file, you can use ROOT to visualize it. You just need to make sure the ROOT installation has openGL/GDML support (CERN AFS installations have it for sure). At the ROOT prompt do:
TGeoManager::Import("detector.gdml");
gGeoManager->GetTopVolume()->Draw("ogl");
This should popup an OpenGL display with the detector which you can clip, pan, rotate etc. You will the image as shown here:
People
- S.Chekanov (ANL, main developer)
- E.May (ANL, debugging, Wired4)
Additional help
- http://jas.freehep.org/jas3/ - JAS3
- http://java.freehep.org/ - FreeHep
- http://jwork.org/dmelt - DMelt
- https://atlaswww.hep.anl.gov/asc/promc/ ProMC file format
- http://lcio.desy.de/ LCIO file format
— Sergei Chekanov 2016/03/23 21:53


